
How to Install Plumbing for a Basement Bathroom
- 1 - Plan and Design the Plumbing System
- 2 - Obtain Necessary Permits
- 3 - Install the Main Drain and Waste Lines
- 4 - Install Water Supply Lines
- 5 - Test the System and Check for Leaks
Installing plumbing for a basement bathroom can seem like a daunting task, but with the right tools, materials, and knowledge, it’s entirely possible to do it yourself. A basement bathroom is a great addition to your home, but it requires proper plumbing to ensure everything functions correctly. In this article, we will guide you through the process of installing plumbing for a basement bathroom, from planning to final tests. If you're looking for plumbing products or services, be sure to visit Plumbers Supply Hub for reliable options.

Cottage Plumbing
Cottage GroveWashington CountyMinnesota
7584 80th St S #310, Cottage Grove, MN 55016, USA
1. Plan and Design the Plumbing System
Before diving into the installation, it's crucial to plan your plumbing system carefully. This includes determining the locations of the toilet, sink, and shower or bathtub, as well as ensuring you have proper drainage. Here are the key considerations:
- Location of Fixtures: Decide where the toilet, shower, and sink will be placed. It's essential to ensure that your plumbing lines will be easily accessible from the main plumbing system.
- Drainage: Make sure you have a gravity-based drainage system that will properly remove wastewater. Basements often require a sewage ejector pump to help waste flow uphill to the main drain line.
- Ventilation: Proper ventilation is necessary to prevent plumbing issues such as odors or clogs. Plan for vent pipes that will allow air to flow freely through the system.
Once you have a plan in place, it’s time to move on to the next step: obtaining the proper permits and materials.
Lew's Plumbing and Drain Cleaning
NoblesvilleHamilton CountyIndiana
2024 Cherry St UNIT 300, Noblesville, IN 46060, USA
2. Obtain Necessary Permits
Most local jurisdictions require permits for plumbing work, especially when adding new fixtures or modifying an existing system. Check with your local building department to determine which permits are required for your project. Some areas may require you to have the work inspected after installation to ensure it meets code.
It's important to follow local regulations to avoid potential fines or issues when selling your home. Once you’ve obtained the necessary permits, you can begin gathering your materials and tools for the installation process.
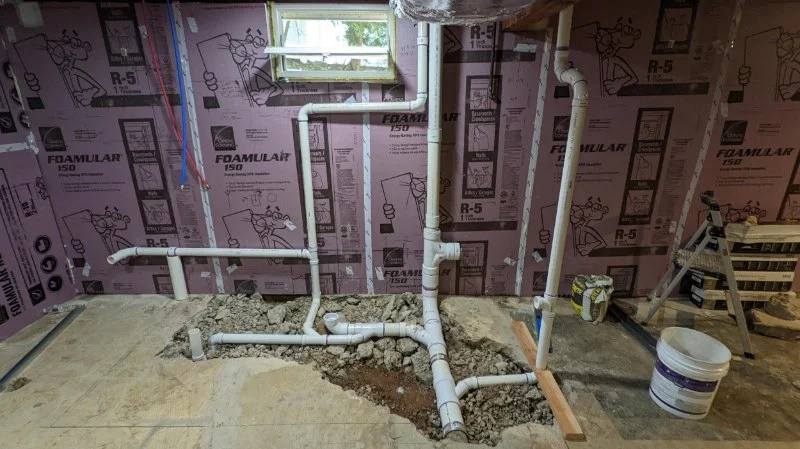
3. Install the Main Drain and Waste Lines
The next step is to install the main drain and waste lines. This is one of the most crucial parts of the plumbing system, as it carries all wastewater away from the bathroom. For a basement bathroom, the main drain should slope away from the fixtures and towards the main sewer line to ensure proper drainage.
If your basement is below the level of the sewer line, you’ll need to install a sewage ejector pump to push waste into the main sewer system. The pump should be installed in a pit, known as a sump, where wastewater from the toilet and sink can accumulate. From there, the waste will be pumped into the main drain line.
It’s important to use high-quality PVC pipes and fittings to ensure a secure and leak-free installation. Be sure to measure and cut the pipes to the correct lengths, and use PVC cement to secure the connections.
4. Install Water Supply Lines
Once the waste lines are in place, it’s time to install the water supply lines. The water supply lines will bring fresh water to the fixtures in your basement bathroom. These lines should be connected to the existing plumbing system in your home.
You'll need to install cold and hot water supply lines, which are usually made of PEX tubing or copper pipes. PEX is often preferred for DIY installations due to its flexibility and ease of use. Make sure to run the water lines from the main supply lines, and install shutoff valves at each fixture (toilet, sink, shower) to allow easy maintenance and repairs.
5. Test the System and Check for Leaks
After all the plumbing is installed, it’s time to test the system to ensure it’s working properly. Turn on the water supply and check each fixture for leaks. Flush the toilet, run the sink, and check the shower or bathtub to ensure water flows freely and that there are no leaks at the connections.
If you find any leaks, turn off the water supply and fix the issue before testing again. Be sure to check the sewage ejector pump (if installed) to make sure it is functioning correctly and efficiently pumping waste to the main sewer line.
Installing plumbing for a basement bathroom can be a rewarding project that adds value and convenience to your home. By following these steps carefully and ensuring everything is done to code, you can ensure a functional and long-lasting bathroom. For professional plumbing products and expert advice, visit Plumbers Supply Hub to find the best tools and services for your project.


 Cisneros Brothers Plumbing, Heating & AC Repair, Water Damage Restoration & Flood Services0.0 (0 reviews)
 Dynamic Plumbers Inglewood5.0 (19 reviews)
 JO-MI Plumbing & Solar4.0 (7 reviews)
 Carey Plumbing4.0 (122 reviews)
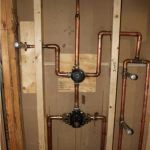 Drain Solutions Plumbing LLC1.0 (8 reviews)
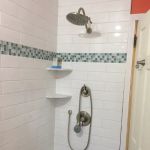 Heights Plumbing and Drain Service5.0 (68 reviews)
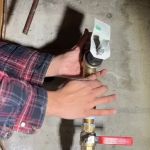 How to Install a Water Pressure Regulator: A DIY Plumbing Project
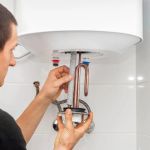 How to Replace a Water Heater Anode Rod
 How to Reset a Tripped Pressure Switch in a Well Pump
 How to Safely Drain a Water Heater Before Moving
 The Complete Guide to Replacing a Kitchen Sink Drain
 How to Replace a Floor Drain Strainer: A Step-by-Step Guide