
- 1. Preparation Before Replacing the Plumbing Fixture
- 2. Turning Off Water Supply
- 3. Removing the Old Plumbing Fixture
- 4. Installing the New Plumbing Fixture
- 5. Testing the New Fixture
- 6. Common Mistakes to Avoid
1. Preparation Before Replacing the Plumbing Fixture
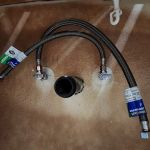
Before you begin replacing an outdated plumbing fixture, ensure you have the necessary tools and materials. Common tools needed include a wrench, pipe tape, pliers, and a screwdriver. Additionally, you'll need to purchase the new fixture that suits your needs, whether it's a faucet, showerhead, or toilet handle. Double-check the measurements of the new fixture to ensure it fits your plumbing system.

2. Turning Off Water Supply
One of the first steps in replacing any plumbing fixture is to turn off the water supply to prevent leaks and flooding. Locate the shut-off valves under the sink, behind the toilet, or near the water meter, depending on the fixture. Turn the valve clockwise to close it and stop the water flow. Always check if the water is off by turning on the faucet to ensure there's no residual water pressure.

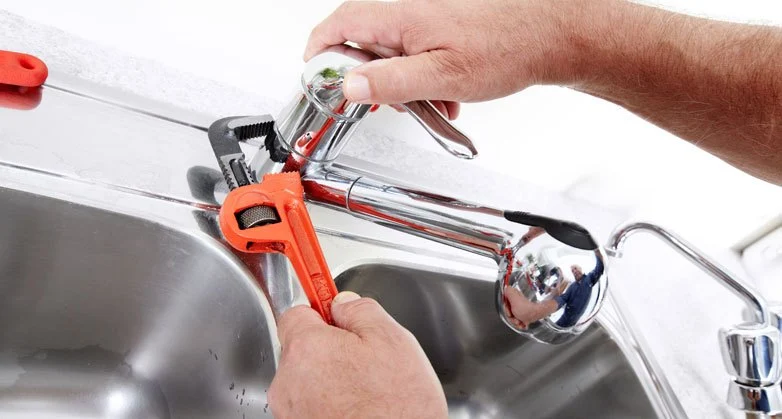
3. Removing the Old Plumbing Fixture
Once the water supply is turned off, begin removing the old fixture. For faucets or showerheads, use your wrench to loosen the nuts that hold the fixture in place. Carefully remove the old fixture by unscrewing it from the pipes. Be cautious of any remaining water in the pipes, as it may leak out when disconnected. Use a towel or small bucket to catch any residual water during the removal process.
4. Installing the New Plumbing Fixture
Now, it's time to install your new fixture. Start by ensuring the new fixture is compatible with your existing plumbing. For faucets, apply plumber’s tape to the threaded areas of the pipes to create a tight seal. Secure the new fixture to the pipes using the appropriate tools, making sure all connections are tight but not over-tightened. If installing a new toilet handle or showerhead, follow the manufacturer's instructions for installation, as different fixtures may require specific steps.
5. Testing the New Fixture
After installing the new plumbing fixture, it’s important to test it before considering the job complete. Slowly turn the water supply back on, ensuring that the connections are secure and there are no leaks. Turn on the faucet, shower, or flush the toilet to test the fixture’s functionality. If any leaks appear, tighten the connections or reapply plumber's tape where needed. Always take your time during this step to ensure everything is properly installed.
6. Common Mistakes to Avoid
Replacing a plumbing fixture can seem straightforward, but there are common mistakes that can lead to problems down the road. These include:
- Not turning off the water supply: This can cause flooding and water damage, making a simple fix turn into a major problem.
- Over-tightening connections: Tightening connections too much can strip the threads and cause leaks or damage to the fixture.
- Using incompatible parts: Always ensure the new fixture matches the size and type of plumbing in your home to avoid installation issues.
- Ignoring leaks during testing: Never assume a slight leak will resolve on its own. It’s essential to address any leaks immediately.
By avoiding these mistakes, you can ensure a successful plumbing fixture replacement that lasts for years.
For more expert advice, plumbing tools, and supplies, visit Plumbers Supply Hub for everything you need for your next plumbing project.


 Circle City Plumbing and Rooter5.0 (192 reviews)
 Bestline Plumbing Inc.0.0 (0 reviews)
 Stewart Plumbing4.0 (20 reviews)
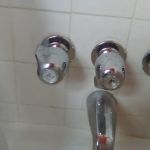 Hacker Plumbing Heating & Cooling4.0 (28 reviews)
 Semper Flow Plumbing4.0 (128 reviews)
 Prieto plumbing5.0 (44 reviews)
 How to Replace a Worn Hose on a Dishwasher
 How to Install a Secondary Drain for Air Conditioners
 Step-by-Step Guide to Installing a Radiant Floor Heating Plumbing Loop
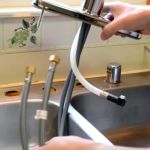 How to Fix a Leaky Faucet Under the Sink - Plumbers Supply Hub
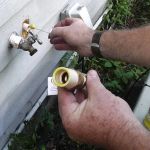 How to Fix a Leaking Hose Bibb: A DIY Plumbing Solution
 What Happens When You Pour Grease Down the Drain