

- 1. Why Replace Your Shower Slide Bar
- 2. Tools Needed for Shower Slide Bar Replacement
- 3. Step-by-Step Guide to Replacing Your Shower Slide Bar
- 4. Tips for a Successful Shower Slide Bar Installation
- 5. Choosing the Right Shower Slide Bar
1. Why Replace Your Shower Slide Bar
Your shower slide bar is an essential component of your shower system, providing flexibility and convenience. It holds the showerhead in place and allows for adjustable height, making it more comfortable for individuals of different heights to shower. Over time, however, shower slide bars can become worn, corroded, or damaged, making them less functional or aesthetically unappealing.
Reasons to replace your shower slide bar include:
- Wear and Tear: Shower slide bars can suffer from rust, corrosion, or damage due to constant exposure to water.
- Improper Function: If the bar no longer holds the showerhead securely or moves smoothly, it may be time for a replacement.
- Updating Your Bathroom Look: A new slide bar can enhance the appearance of your shower and give your bathroom a fresh, modern look.
2. Tools Needed for Shower Slide Bar Replacement
Replacing a shower slide bar is a relatively simple DIY project that doesn’t require extensive experience, but it does need some basic tools. Here's a list of tools you will need:
- Adjustable Wrench: To remove the old slide bar brackets and fittings.
- Screwdriver: To loosen and tighten screws that hold the slide bar in place.
- Power Drill: To make new holes if necessary for the new bar's installation.
- Measuring Tape: To measure and align the new slide bar correctly.
- Level: To ensure that the new shower slide bar is installed straight and level.
- Silicone Sealant: To seal around the installation points to prevent water leaks.
3. Step-by-Step Guide to Replacing Your Shower Slide Bar
Follow these simple steps to replace your adjustable shower slide bar:

AM/FM Plumbing & Services, INC.
ChannahonGrundy CountyIllinois
26115 S Rachael Dr, Channahon, IL 60410, USA
Step 1: Remove the Old Shower Slide Bar
Start by turning off the water supply to your shower. Use the adjustable wrench to remove the old shower slide bar, unscrewing the brackets that hold the bar in place. If the slide bar is mounted to the wall with screws, use your screwdriver to loosen and remove them. Once the brackets are removed, gently pull the old bar out of place.

Step 2: Clean and Prep the Wall
Before installing the new slide bar, clean the wall where the old bar was attached. Remove any rust, dirt, or residue that might prevent the new bar from being securely mounted. Use a mild cleaning solution or water and a sponge to wipe the area clean.
Step 3: Mark and Measure for the New Slide Bar
Using a measuring tape, mark the desired height and location for the new shower slide bar. Use a level to ensure that the new bar will be installed evenly. Mark the points where the new brackets will be mounted, making sure they align with the holes on the new bar.
Step 4: Drill Holes for the New Slide Bar
Once the measurements are marked, drill holes into the wall at the designated points. Make sure the holes are the right size for the screws or anchors you'll be using to mount the new brackets. If you're replacing an old bar, the holes may need to be adjusted to fit the new slide bar brackets.
Step 5: Install the New Slide Bar
Attach the new brackets to the wall using screws or anchors. Once the brackets are secure, slide the shower bar into place and tighten the screws that hold it. Ensure that the bar moves smoothly along its tracks, and check that the height is adjustable as needed.
Step 6: Seal and Test
Apply a small amount of silicone sealant around the base of the brackets to prevent water leakage. Allow the sealant to dry for a few hours before using the shower. Test the new slide bar by adjusting the height and ensuring the showerhead is secure and functions properly.
4. Tips for a Successful Shower Slide Bar Installation
To ensure your shower slide bar replacement is a success, here are some helpful tips:
1. Double-Check Measurements
Accurate measurements are key to a smooth installation. Double-check the height and alignment before drilling any holes to avoid making mistakes that could result in a crooked or unstable slide bar.
2. Use the Right Anchors
If you're installing the slide bar on a tile wall, be sure to use appropriate wall anchors. Using the wrong type of anchor can result in the slide bar becoming loose over time, especially if it’s exposed to heavy water pressure.
3. Don’t Over-Tighten Screws
While it’s important to secure the brackets, over-tightening the screws can crack the tiles or damage the wall. Tighten the screws firmly, but stop before putting too much pressure on the installation.
5. Choosing the Right Shower Slide Bar
When selecting a new shower slide bar, consider the following factors:
1. Material and Durability
Shower slide bars come in various materials, such as stainless steel, plastic, and chrome. Stainless steel is highly durable and resistant to rust, making it a good choice for long-term use in a humid environment like a bathroom. If you're looking for something more affordable, plastic or chrome options may work for less frequent use.
2. Adjustable Features
Look for a slide bar that offers easy adjustability. Whether you want it to move up and down smoothly or lock into a specific height, a good adjustable shower bar will provide convenience and flexibility for different users in the household.
3. Compatibility with Showerheads
Ensure that the shower slide bar you choose is compatible with your existing showerhead. Some slide bars are designed to work with a variety of showerheads, while others may require specific types of connections. It’s important to match the slide bar with your current setup to avoid installation issues.
For more expert advice, product recommendations, and to find the best shower slide bars for your needs, visit Plumbers Supply Hub, where we offer a wide range of plumbing products for home improvement projects.


 Sinclair Plumbing, Inc.4.0 (61 reviews)
 The Water Heater Guys5.0 (43 reviews)
 Cantrell Plumbing & Hydro Jetting4.0 (22 reviews)
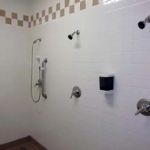 Noah's Plumbing, Heating & Cooling, LLC4.0 (379 reviews)
 American Plumbing4.0 (83 reviews)
 Michigan Hahn Plumbing Service4.0 (50 reviews)
 How to Replace a Mixing Valve for Tempered Water | Plumbers Supply Hub
 Plumbing Safety Tips for Homeowners Tackling DIY Projects | Safe Plumbing Solutions
 How to Repair a Swollen P-Trap After a Clog
 How to Repair a Slab Leak Under the Floor: Step-by-Step Expert Guide
 How to Route a New Plumbing Run in a Finished Basement – Step-by-Step Guide
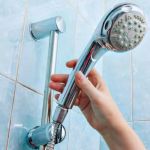 How to Install a New Showerhead: A Step-by-Step DIY Plumbing Guide