

How to Replace a Splice Coupling That Fails
- 1 - Understanding Splice Couplings and Their Role
- 2 - Common Causes of Splice Coupling Failure
- 3 - Steps to Replace a Splice Coupling
- 4 - Tools and Materials Needed for Splice Coupling Replacement
- 5 - Preventing Splice Coupling Failure in the Future
1 - Understanding Splice Couplings and Their Role
A splice coupling is a crucial component in various plumbing and electrical systems, designed to connect two pipes or cables together. These couplings are commonly used to repair or extend existing piping, ensuring a secure and leak-free connection. When these couplings fail, it can lead to leaks, damage, or even system failure, which makes timely replacement necessary.
Tom's Plumbing Service TPS - La Habra
La HabraOrange CountyCalifornia
431 S Harbor Blvd, La Habra, CA 90631, USA
1.1 What Is a Splice Coupling?
A splice coupling is essentially a connector that joins two sections of pipe or wire. In plumbing systems, splice couplings are used to repair or extend pipes, while in electrical systems, they serve to splice wires together. The coupling provides a secure, leak-proof seal that ensures the integrity of the system.
Finch Plumbing Co., Inc.
BridgetonSt. Louis CountyMissouri
3377 Hollenberg Dr, Bridgeton, MO 63044, USA
1.2 Types of Splice Couplings
There are various types of splice couplings depending on the material and application. For plumbing, common types include PVC, copper, and steel couplings. In electrical systems, you might encounter wire nuts, twist-on connectors, or crimp connectors, each serving a unique purpose based on the environment and requirements of the system.
2 - Common Causes of Splice Coupling Failure
Splice couplings, while designed for durability, can fail due to a variety of reasons. Identifying these causes early can help you avoid repeated failures and unnecessary replacements.
2.1 Poor Installation
Improper installation is one of the leading causes of splice coupling failure. If the coupling is not properly aligned or tightened, it can lead to leaks or disconnections. This is especially common when coupling materials are not matched correctly, like using a PVC coupling with a metal pipe.
2.2 Wear and Tear
Over time, splice couplings can degrade due to constant pressure, temperature fluctuations, or exposure to corrosive elements. This is especially true in plumbing systems where water pressure and chemical exposure can weaken the materials used in the coupling.
2.3 Incorrect Sizing
Using a splice coupling that’s the wrong size for the pipes or wires can cause improper seals, leading to leaks or disconnections. It’s critical to measure the pipe or wire dimensions accurately to ensure a proper fit.
3 - Steps to Replace a Splice Coupling
Replacing a splice coupling is a straightforward task, but it requires attention to detail to ensure it’s done correctly. Follow these steps to replace a failed splice coupling with minimal hassle.
3.1 Turn Off Water or Power Supply
The first step before replacing a splice coupling in plumbing or electrical systems is to turn off the water supply or electrical power. This is crucial to avoid any accidents or water damage during the replacement process.
3.2 Remove the Failed Coupling
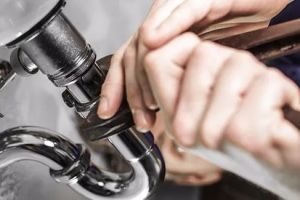
Depending on the type of splice coupling, you may need a wrench, pipe cutter, or screwdriver to remove the old coupling. If the coupling is glued (for plumbing), use a solvent to dissolve the adhesive, then carefully remove it from the pipe or cable.
3.3 Prepare the New Coupling
Before installing the new splice coupling, ensure that it is the correct size and type for your system. Clean the ends of the pipes or cables where the coupling will be installed, removing any dirt, rust, or corrosion. This ensures a better seal and connection.
3.4 Install the New Coupling
Install the new splice coupling by carefully connecting the pipes or wires and securing the coupling tightly. For plumbing systems, use a pipe wrench to tighten the coupling, and for electrical systems, use the proper crimping tools or twist-on connectors.
3.5 Test the Connection
After installation, turn the water or power back on and check for any leaks or issues with the connection. Ensure that the new splice coupling is functioning correctly and is securely in place. If there are any signs of leaks or malfunctions, double-check the installation for tightness and fit.
4 - Tools and Materials Needed for Splice Coupling Replacement
To replace a splice coupling successfully, having the right tools and materials is essential. Below is a list of the common items you’ll need for this task.
4.1 Pipe Cutter or Saw
A pipe cutter or saw will be necessary to remove the old splice coupling from the piping. Make sure to use the appropriate tool based on the material you’re working with, whether it’s PVC, copper, or steel.
4.2 Wrenches and Pliers
A pipe wrench or adjustable pliers are essential for securing the new splice coupling in place. These tools allow you to apply the necessary pressure to ensure a tight, secure connection.
4.3 Solvents or Adhesives
If you’re working with glued pipes, a solvent will be necessary to remove the old adhesive. Make sure to use the correct solvent based on the type of material being worked with (e.g., PVC cleaner for PVC pipes).
4.4 Crimping Tool or Wire Cutter
For electrical splice couplings, crimping tools or wire cutters will be required to ensure a secure connection between wires. These tools ensure that the connection is tight and safe.
5 - Preventing Splice Coupling Failure in the Future
Preventing splice coupling failure is easier than you might think. By taking a few simple steps and being mindful of the installation process, you can avoid costly repairs in the future.
5.1 Regular Inspections
Regularly inspect your piping or wiring system to check for signs of wear or damage. Identifying potential issues early can help you address them before a splice coupling fails.
5.2 Proper Installation
Ensure that each splice coupling is installed correctly. Follow manufacturer guidelines to ensure that the coupling is the right size, properly tightened, and securely fitted to the pipes or wires.
5.3 Use High-Quality Couplings
Always opt for high-quality splice couplings to ensure durability and reliability. Using inferior materials can lead to quicker wear and tear, ultimately increasing the likelihood of failure.


 Roto-Rooter Plumbing & Water Cleanup4.0 (1076 reviews)
 Hard Knox Plumbing5.0 (272 reviews)
 South Haven Sewer Works2.0 (3 reviews)
 Proper Plumbing5.0 (80 reviews)
 Pro Sewer Svc4.0 (32 reviews)
 Jacob & Sons Plumbers4.0 (40 reviews)
 How to Fix a Leaky Sink Drain: A Step-by-Step Plumbing Guide
 How to Replace a Toilet Flush Lever: Easy Step-by-Step Guide
 What Causes High Water Bills and How to Fix It
 How to Insulate Exposed Pipes Without Blocking Access
 How to Prevent and Fix Toilet Clogs | Expert Solutions
 How to Fix a Sink That Rattles When Water Runs: Troubleshooting Guide